0:00:00.6: I have a problem. That's in the way of me getting those... Where are they... Yeah, those boxes and those boxes back there out, so we're gonna have to change it.
[music]
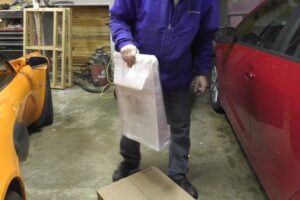
0:00:50.5: All the boxes are moved into the house. Now, it's time to take everything out of the boxes and see what we got, see where the instructions are to put our new hatchling rack together from Vision Products. In one of these boxes is something completely new for Vision Products. Well, it's a new twist on something that they already have. I think it'd be more beneficial for hatchlings, so that's why I went with these guys and this whole rack system that I got, it's their VersaRac system, and I wanted a VersaRac because you can actually change the tub size as your snake grows and still use the exact same rack. You can start off with the V-15s, which is what I have, then once your snake gets larger, you can move up to the V-18s, so you can put two in each area. You can go even further then and go to the V-35-S', which are one in each area. So, as we sell our hatchlings, and the other hatchlings are growing or whatnot, I'll be able to upgrade them to a larger tub size. Alright, let's go for some time-lapse action, shall we?
[music]
0:02:57.7: I'm just trying something here. This is a garage-strong kitchen-safe lubricant, LiquiFix. Spray a little bit on my hand, spread it on the poles to help lubricate the poles, maybe the levels would actually slide down the poles a little bit easier. That works so much easier.
[music]
0:04:32.0: And that's it. Well, not quite, 'cause right now they're all finger-tight, still a little wobbly, but... These spin a little too easy, but we're gonna change that to what it says you need a 9/16". I'm gonna use a socket. Okay, that's the right size, that's good. And then what we're gonna do is we're gonna take a tub and we're gonna slide it in here and make sure that... 'Cause the more you tighten this, the harder it's gonna be to pull the tubs in and out, so it's a feel thing. If you want the tubs to be really secure, where it takes a little bit of effort for 'em to come out, then you tighten these even tighter, but if you want 'em to be somewhat easy to pull out, you just basically go a little bit over finger-tight and you probably should be fine. So now I'm gonna get the tubs that we're gonna be putting in here, and that's the big surprise that Vision has for you. Lo and behold, Vision's got new tubs. They're not on the website yet, they are actually working on rebuilding their product website. The last time I picked up some more tubs for rat racks, they told me they actually had these in stock. When I ordered this, and they said they had these, I said that "Can I have this rack with the grey tubs?"
0:06:02.0: They're like, "Yeah, but they're not on the website yet, so you're the first one to get them." These are made out of recyclable plastics. You will be able to get 'em in all the sizes that they offer. I do believe up to the V-70s. With the bigger tubs, there may be some swirls in the plastic. It's because of the recycled plastics they are using to produce these tubs. It's only cosmetic, it won't affect any of the function of the tub, just gives it a different little look, you can say. So these are the V-15s, and I'll go get some... I also picked up some V-18s and some V-35s'. All three of them will fit in this rack. That's the main reason why I picked Vision for our hatchling rack because I can go from this up to... Well, I'll just get the tubs. All right, here you go. Here's the V-15, the V-18, which is just over a hand with it, and this one just barely fits my hand in it, and then between these two, V-35-S can fit three of the 15s across, or you can do two of the 18s, or a 15 and an 18, you have options, or 135. I got all the bump stops installed on the backs, so now the tubs, they don't come out, but now we gotta do the heat cable. For this size rack, they provide two bags of heat cable at 52 feet.
0:08:01.9: Each cable is 150 watts. That's full-on. That should be enough to run two runs back and forth the whole 32 inches and then come down and then run back and forth and back down again on the backside for half of the rack. You see these little buttons right here, the heat cable slides right in, just push it down. I started it over here, pulled it through, over to there, looped it around, came back. Now, I'm gonna go down here. I wanna pull this whole side in first. This little bit won't be touched by a tub, so we should have no worry about it being up and over.
[music]
0:09:22.6: Start at the top, work your way down to the middle, we have just enough cable left. If you wanna put your thermostat up at the top, you can do so. That's a good thing, 'cause now I'm gonna start from the bottom, work my way up to the middle, I'll be able to have both those cables going up to the top together to the VE-300x2 that I'm gonna be using to run this rack. All right, got 'em all wired up. Oh, yeah, I can't see up there due to lack a light, but I have 'em all wired up. It's just enough, but just so you can... There, move it all the way over. I went from the furthest one to the furthest one, underneath this area, which is an inch and a half, since it's spaced fairly decent away, the amount area I would guess would be about two and a half to three inches wide that it would heat up, and it's not all the way at the back of the tub either, so that's good. So your little hatchling can sit right here, it can go either way and be comfortably warm. Let's fill her all up with tubs.
[music]
0:11:48.3: What we're gonna do, the temp control, this rack, top and the lower section is the VE-300x2. I have one of these controlling my pair of sea serpent racks on there. This is gonna control this big rack. The reason why I push these out, because I'm gonna zip tie this thermocouple onto the heat cable so that it can read the temperature of the actual heat cable and make sure it does not go over the temperature that I set. In two spots, thermocouple right next to it, and then for extra support this one. Cool thing is you can still snap into the track that I want it in, and then the thermocouple wire can also snap-in... Pretty close to snapping in. It can rest inside of the track if you can see it. I used the guides for the thermocouple wires again as extra support, so they don't get yanked out. Put in over here in the correct spots, made these the correct spots, and the VE-300 sits up here, on a lean pretty decently. Now I have, hatchling rack to go along with a sub-adult rack... All different products, but this is the big purchase or one of them. The price and the expandability can't be beat. Worth the buy 100%. Takes a little time to put together, but it's worth it, trust me. 0:13:33.9: Thanks for watching this video. If you like it, please subscribe to our channel as we grow, we are coming up with, or at least trying to come up with new ideas to be able to have things to share for everybody with our adventures with reptile keeping. Till next time, like, share, and subscribe and I'll talk to you later.