Transcript
Intro:
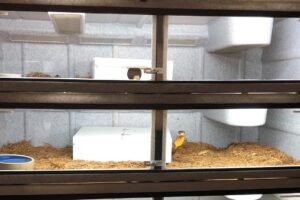
what's going on guys welcome back to yet another episode so in this episode i'm doing another tutorial on how to heat and light a vision cage this vision cage behind me is like a medium size it is a model 332 uh this is on average a lot of people do have this cage so i kind of wanted to do again a couple different videos on how i do my vision cages so if you guys at home have vision cages and want to do the same thing you can so we're going to jump into this video hopefully you guys enjoy it [Music] all right guys to start this video off i wanted to introduce you to this little guy um now this was originally a piece of this i did cut it to trim it i wanted to show you guys that this actually fits right inside the lip of the cage very easily now this is another solution instead of foaming the cage you can get these guys and kind of squeeze them up there and it blocks snakes from going up there now personally i don't enjoy doing this i just like to foam it i feel like this could possibly come out i've seen other people like mark mccarthy's their wildlife sanctuary they use this stuff it is sold in different sizes all this is is simply a foam tube kind of like a pool noodle but this is for insulating water heater pipe so if you have a water heater in your house you might have seen this before but they sell out at all like little hardware stores or home depot or loads so you can buy this cut it to fit the frame of the cage and stick it in there if you want
Lighting:
so now i did flip the cage upside down uh this is the light that i will be using i will put a link in the description for the amazon list i get this off of again these lights come in all different sizes you got one foot two foot three foot four foot and i think even six foot but um so this is what i use in here i'm going to very simply kind of wedge it in here now you kind of have to play with it if you guys come on over here you can see a little bit better um so there is two rows of lights on this particular light you obviously don't want one aiming towards the glass so you want to kind of angle it back now when you angle it back you want it to be able to shoot down or shoot a little bit past down from the cage so what i'll basically be doing is getting the angle where i like it right taking these clamps now these are woodworking clamps again you can get them in any hardware store kind of getting one on there a little snug taking the second one doing it over here [Music] all right so once you kind of have them where you both want it it's pretty simple so the light is stuck in place and now you can take your great stuff foam or silicone or whatever material you actually want to use to hold the light in place to then go ahead and work around it so
Cord:
now for the cord um on this particular one i've now done so many of these i've learned there's an easier way to hide the cord so you don't kind of have the cord going across the top so as you see here i have the cord kind of just laying here so you can actually hide it behind the light so i'm going to take this clamp off take the cord kind of fold it up underneath the light there and then take the clamp and put the clamp back on so now when you foam it over here the cord isn't out and then when you go ahead and later i'll show you guys as we silicone this lip you can then take the cord drill a small hole right here which again you guys will see that here in a minute um and run the cord up makes it a lot easier good alright guys so again the foam i
Foam:
use is great stuff pond and stone again i will put that in the description as well so you guys can have the link for this uh amazon is the only place i've been able to find it you can special order from home depot but it takes a lot longer uh to get than it does from amazon but i live by this stuff i absolutely love it so this is what we're gonna be using to foam in the light so now coming over here carefully all you gotta simply do is start filling in those cracks and let the magic happen you've got to be very careful to not hit the clamps because if you hit the clamps you're going to knock off the light it's going to fall and yeah i've had that happen to me once or twice not very fun so just make sure you're getting around the light very very good very well whatever you want to call it filling in on that top crack this way no snakes can get behind it or in the lip so now that that's foamed we're gonna let that dry and we'll be
Foam Removal:
back in a little bit alright guys so after the foam uh cured around the light i went ahead and did the rest of the foam around the cage the next part is pretty simple just cutting the foam away again with this stuff you don't have to do that but you could silicone this stuff in two i just like the foam better so again that's what i do so we're gonna go ahead and cut the foam away and then we're gonna move on to the light process of this cage now
Electrical:
coming over to the electrical part of it i didn't know i had so many professional electricians uh that actually watched my youtube video so thank you guys for that um so in my last video i did on a smaller vision cage um i kind of used a beginner clamp or wire butt whatever you want to call it for it um and i didn't torch it i didn't wrap it i said you know you could wrap it up in electrical tape and so many people commented on that video so what i'm going to do in this video is kind of move up to the next step sorry about all the cars in the background um but you also are going to want to drill so what i'm basically doing is drilling basically a hole right here this is where the wire is going to come out just like that then i can take this wire stick it through here boom and now you can work on the wire outside of the cage it's a lot easier Wiring now coming on over here you guys walk over here you can see the wire is kind of laying right here now a couple different options you can do is silicone it down uh it's a little difficult to do that sometimes something else i've also done is taken a smaller drill bit put two holes next to it and actually zip tie with a tiny little zip tie uh the cord to the top of the cage you guys will probably see that in the next video uh this one i'm just gonna simply silicon it down so it's in place i don't have to worry about a zip tie but we're gonna do that after we do some fun electrical work so i'm gonna get these wires ready if you guys would like to see this process go ahead and click the link up top here this is the last video i did doing one of these cages i'm going to get it ready and then when i'm ready to put the wires together then we're going to start filming again
Butt Connectors:
all right guys so again in my last video i showed you a different uh butt connector type this one is actually like a heat shrink butt connector i prefer these this is pretty much what i use on every single cage again i just showed the other one to kind of show different plug connectors so this one you see the fatter end here will actually melt when you take a torch to it so what we're going to be doing oh the dogs are behind me so what we're going to be doing is clamping this onto the wire again simple clamp tool for the butt connectors you can get them at any hardware store so basically what you do slide the wire in clamp it on there [Music] make sure it's nice and tight so you can do it in two different ways you can do it either do one wire at a time melt it then do the other wire or you can just do it all at once i prefer to do it all at once it's a lot easier for me that way so again making sure you want the same colored wires to go together i did see that a couple people like what happens if you uh put the wrong wire on well i don't know because i've never done that so i don't plan on doing that again i'm not a master electrician but uh i'm sure it wouldn't be a good thing all right so both those guys are on there this is really fast really easy so i'm gonna come over here and grab my torch so now if you guys look right here very carefully i'm just gonna now you can do this with a light or two um if you don't by chance have a torch but again i do this on a mass level so i have a torch to make it easier but i'm just simply melting this i wouldn't suggest doing this inside either [Applause] because uh it is melting plastic it does sting so if you look right here now the butt connectors are melted to the wires so you they're a little bit more secure and waterproof as well so next we're going to be siliconing the light in place this is an extra precaution that i particularly like to do especially for keeping cobras in these cages because cobras will still try to wedge behind the lights all right so here you can kind of see i know it's very dark i'm sorry but you can kind of see the silicone there it doesn't have to be beautiful you're never going to see it again after you put it in yes there's a gap there it's very hard to get the silicone past this lip here coming out over here the cord is all silicone down again doesn't have to be beautiful you're not going to see it
Heating:
so it's pretty pretty simple um to do it but now that this is done we're going to go put the cage inside the snake room we're going to set it up and we're going to talk about heat i prefer to use the deep domes with this particular model just because it's a lot easier and you can use bigger light bulbs in them so now knowing your reptile that you're going to put in there is obviously a key fact you could you know use a 75 watt heat bulb which would be for like a desert-esque species i prefer to use the 25 watt heat bulbs just because the distance in this particular cage is like 11 and a half inches i believe if you want to use uvb you can use the uvb you know zoo med makes a 10.0 and also a 5.0 i prefer to use the 5.0 but stores out of them so 10.0 it is um it doesn't really make that much of a difference but you know your spectrum um of how many inches that light is sitting off the floor and also make sure you test it before putting the reptile in there with a heat gun you can pick them up in hardware stores for i think like under 10 bucks they're relatively easy and they're kind of cool because they look like a laser pointer you could literally point it at anything and yeah it goes all the way across the room so currently right now i am 92 degrees so so that's gonna be it for this video guys hope you enjoyed this quick little tutorial um yeah [Music] this is for future people even if you don't like it you can still hit the thumbs up see you guys in the next one bye you