Visionarium Assembly Guide
It’s time to set up your new Visionarium! Before you begin, please read the Important Notes below.
Important Notes
- See the video below to install the door(s) on your Visionarium.
- Follow each step in order. Deviating may cause issues later.
- If parts are missing or damaged, please contact our support team.
Visionarium Door Installation

Visionarium Vent Cover Installation
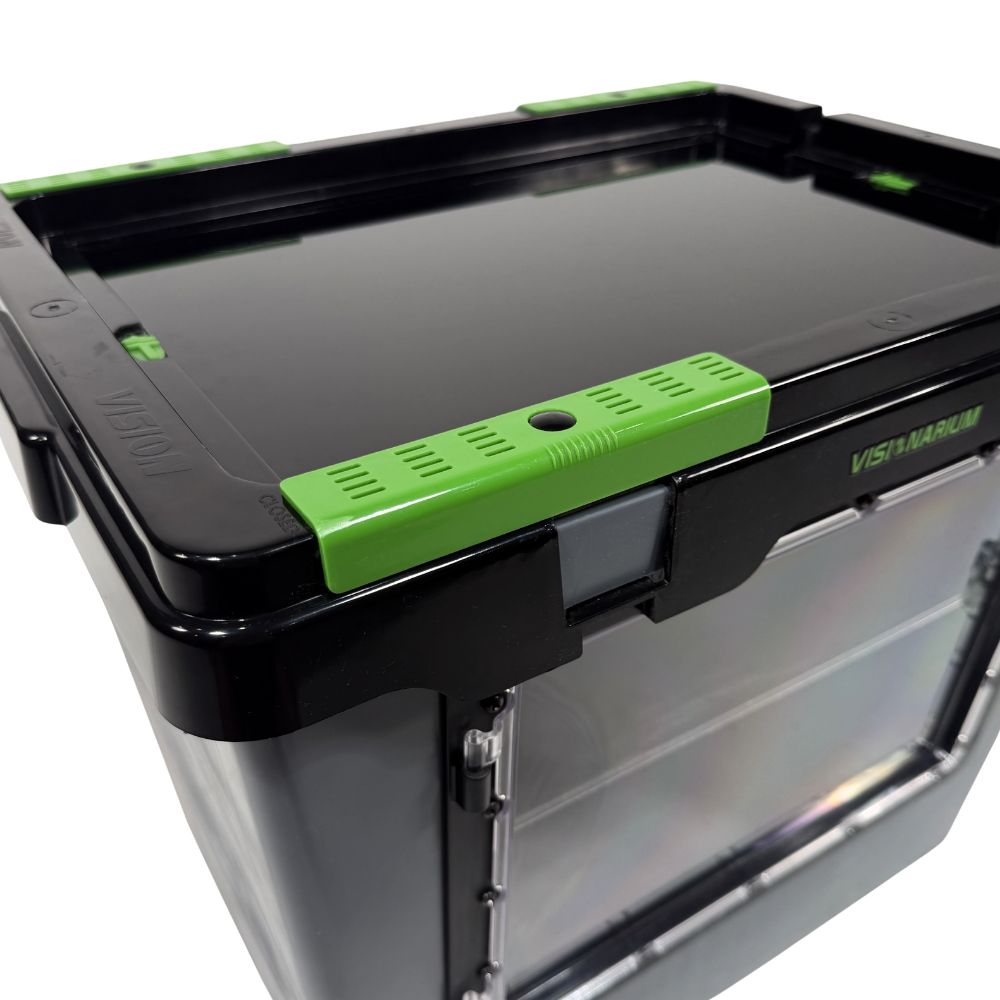
- Grab a push-in rivet and a green vent cover.
- Push the rivet through the hole of the vent cover until it snaps into place.
- To attach the vent cover, line up the rivet with the rectangular hole near the corner of the lid and apply pressure until it snaps into place.
- Slide the vent cover left and right to reveal an OPEN label on one end and a CLOSED label on the other.
If OPEN is showing, air is flowing. If CLOSED is showing, airflow is cut off.
Trouble with Assembly?
If parts are missing or damaged, or if you have general assembly questions, please contact us.