Transcript
Intro
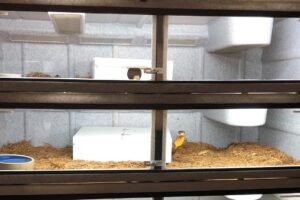
what's up guys so something i'm constantly getting asked particularly a lot um on some older videos so i thought i would do a new video on this and i'm gonna do a series of these videos because there's so many different styles and ways to do it you guys know i like to light my vision cages now i do this not only to make it easier for me for cleaning and filming them obviously but it looks good and i mean good so in this episode guys i'm going to do step by step of what i do starting with one of the smaller vision cages model 211 okay two one one so this is a smaller vision cage which are these guys right here you can kind of see in the background i do have the lights off in them right now but i'm putting some new lights in them now new lights plus adding heat to a lot of these guys as well because that's something i get asked quite frequently how do i heat my vision cages what temps do i keep some of my snakes at which you know does depend on the snake you have in that cage so i'm going to go over the basics with you guys and show you how i do it now starting
The Basics
off with the light i did get off amazon it's the same light i used to even light up my rooms this light is very bright and it is white which is a huge plus it actually sits perfectly in the lip of this cage you don't need to screw it in to secure it or anything now it's just this model it does that you'll see in future videos it doesn't sit as well in those lips using great stuff pond and stone i'm going to use this to fill the inside lip of the vision cages now there is other techniques you can do which again i will discuss with you in further videos but in this particular video i'm just going to use the great stuff so now once you get the entire inside of the lip foam it should look a little something like this that's okay the excess foam is very easily cut away so just like you would cut away the foam on a vivarium you can do the same thing with this stuff to make it nice and flush with the lip of the cage just simply cut it away with a knife or razor blade and just peel it away with your hand once the cage is all cleaned out it looks pretty good cannot complain with that you can then go ahead and start your process with the light seeing as you don't want that cord hanging out the door
Wire Splicing
so now the part that everybody absolutely hates or fears is splicing the wire now splicing the wire is really easy all you have to do is cut it and kind of get away some of that insulation so this is a double insulated wire so there's the wire itself that is insulated once and then another insulating coat on the outside which is the white that you see on the outside of the wire so taking a razor blade i'm kind of splitting the two other insulated wires pulling them apart a little bit so i have room to work and now you can kind of see that there is a brown wire and a blue wire on the inside now the wires can be different colors black and white red and white red and black it just depends on the company and what they choose to make so right there you can see there's two wires on the inside they are color coded now once you do the other side as well you can take your wire splicing tools and you want to cut off that smaller inside insulation piece without trying to damage the wires on the inside because that could lead to further problems but if you have the right tools you shouldn't do that now you can also use a razor blade to kind of trim away the insulation as well but you should just get a 10 tool like the one i'm using next we're going to take a butt connector so this is the kind you just crush onto a wire now inside the butt connector there is a little metal ring you want to slide the wire into that and then all you have to do is simply crush it onto the wire i was trying to get this so the camera can see it but it's very difficult but once you get it nice and crushed on there all you have to very simply do is give it a nice little tug to make sure it is on the wire so now once both sides are done you can lay that piece down
Wiring
now you've seen me do this many times before if you guys are new to the channel you have not yes i am drilling a hole in the vision cage for a good reason i promise this way you can actually slide the wire that is inside of the cage right out of the hole a lot easier than having it run out the door so once you get that wire run out the hole then you can go ahead and start the process of connecting them to the other wires so you're relatively doing the same exact thing you just did on the other two just make sure you connect the proper color to the proper color so in this case both the brown wires and both the blue wires will go together do now normally i don't do this but you can actually take electrical tape and then wrap it around the work area that you just had done to the wires this is kind of just a little extra safety you could do you don't really need to do this [Music] now you don't want this wire hanging down because snakes will try and climb up there and rip it down or climb up there and just hang out there i've had this problem previously in the past so we definitely need to secure that wire so nothing can rip the light down so
Silicone
taking a clamp here we're going to go ahead and kind of just pin the wire to the side so i am able to then get some silicone and just very simply put a little bit on there to attach it to the foam and the top of the cage so once you got the inside silicone it's nice and dry and you can flip it around i'm actually going to be taking two other types of clamps now these are used usually for woodworking or carpentry and just securing the wire where i want it now i'm doing this so i can again silicone it now you don't need to silicone it but if you are going to run a heat light in these cages you want to secure it to the side so that it doesn't rest on the heat light and possibly melt the wire to the heat light because i've seen that happen and it's never a good outcome so then just taking a single bead of silicone and running it along the entire stretch of cord that is uncovered now you can let gravity do its thing here and just kind of let the silicone sit there and dry or you can run your finger along the wire to kind of help push it behind the wire as well get it underneath if you really want to so what i just did is run my finger along it and then all that excess stuff that's building up on my finger i then took it underneath the cord and ran it back under the other side
Heat
so for this next part this is where the heat element comes in there's two different ways you can heat a vision cage one you can actually take duct tape not duct tape duct as in your ac ducts tape it's a metal tape and you can tape a heat pad to the bottom of your cage or for this particular model it's very hard to heat with a heat light but i just recently found these so this is a single low profile fixture by zilla again i will put all the links in the description below so you guys can find these on amazon now it's a very low profile light so it fits in there no problem you can stack other visions on top of it and it's not going to interfere with the light itself [Music] so there it is with the light on the heat like that is now that is a 25 watt heat bulb very simple very easy it averages out about 85 degrees in the cage itself which is perfect for most of the snakes i'm keeping in there now that nice bright new white light man it looks good so that's gonna be it for this video guys hopefully you enjoyed it hopefully you learned something new and hopefully that answers some questions that a lot of people have been asking me lately so remember subscribe if you are not already smash that like button if you haven't already and big thank you for watching for all my patreons you guys are amazing thank you as well guys i am still doing the gofundme for the new snake building uh we've been putting in a lot of work but we're almost to that point for the new snake building which i'm really excited about so if you guys would like to donate to that check out the link in the description for that as well and i will see you guys in the next video bye you